Last updated on October 23rd, 2024 at 04:03 pm
Gridlines in Excel
how to remove gridlines in excel
Gridlines in Microsoft Excel are the horizontal and vertical grey coloured lines that differentiate between all the cells in a worksheet. These grid lines help in reading the data in an organised manner. They also help the users to navigate through the worksheet columns and rows with ease. Without the grid lines, the users would face difficulties reading the data due to the lack of organization. Many users out there confuse grid lines with cell borders which are applied to specific regions of the worksheet. The user should note that while printing a worksheet, the gridlines are not printed on the paper and only the borders used for the cells are printed.
Understanding Excel gridlines.
Grid lines in Microsoft Excel are applicable by default in the whole worksheet. These guidelines cannot be applied or deleted from a specific section from the worksheet. If you want to make a certain section of the worksheet different from the rest, you may use borders to make customizations to specific cells or a group of cells.
How to Remove Gridlines from Excel
If for some reason, you do not want the gridlines visible on your Excel you can do the following steps.
Step 1: Go to page layout
Step 2: On the toolbar, you will see the option of viewing the gridlines.
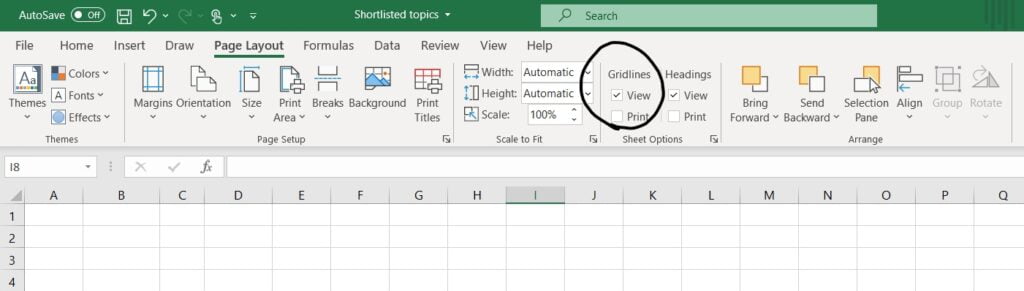
To use the keyboard shortcut option to remove the grid lines, you have to press Alt and enter W, V, G.
How to change the colour of Gridlines?
If you wish to change the colour of the gridlines, follow the following steps.
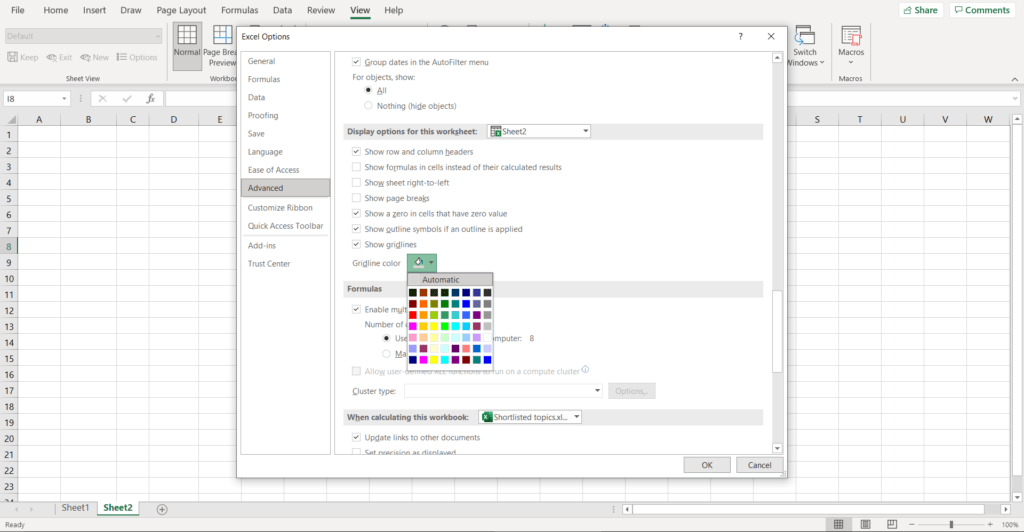
Step 1: Click on the file from the top left corner and then go to options.
Step 2: In the options settings, click advanced on the left panel
Step 3: Scroll down to the display options section. At the bottom of this section use the gridline colour box to expand the drop-down list.
Step 4: Choose your preferred colour to close the dialogue box.
Note – The above steps only apply to the current Excel worksheet and not to the entire workbook. If you wish to change colours for all the worksheets, you must group the worksheets by holding the control key and selecting all tabs.
Related
A CFA charterholder with hands-on experience across investment analysis and finance education. At MentorMeCareers, he writes and reviews content on CFA, financial modeling, and investment banking careers — grounded in real market data rather than generic advice, and shaped by what actually helps candidates and professionals succeed.